
Studio Lighting: A Beginner's Guide to Mastering Photography Lighting Techniques
Sep 22, 23
Studio Lighting: A Beginner's Guide
Table of Contents
-
Introduction
- What Is Studio Lighting?
- Why Is Studio Lighting Important?
- Setting the Stage for Success
- A Glimpse into the World of Lighting Equipment
-
Understanding Light Sources
- Natural vs. Artificial Light
- Types of Artificial Light Sources
- Continuous Lighting
- Flash Lighting
- LED Lighting
- Tungsten Lighting
-
Basic Lighting Techniques
- Three-Point Lighting
- Key Light
- Fill Light
- Backlight
- Lighting Ratios: Shedding Light on Shadows
- High-Key Lighting
- Low-Key Lighting
- Balanced Lighting
- Three-Point Lighting
-
Essential Lighting Equipment
- Cameras and Lenses
- Light Modifiers
- Softboxes
- Umbrellas
- Reflectors
- Grids and Snoots
- Light Stands and Mounts
- Light Meters and Color Temperature
-
Setting Up Your Studio
- Choosing the Right Space
- Backgrounds and Props
- Safety Precautions
- Wiring and Power Management
-
Mastering Lighting Techniques
- Portrait Lighting
- Split Lighting
- Loop Lighting
- Rembrandt Lighting
- Butterfly Lighting
- Product Photography Lighting
- Light Tent
- Light Table
- Reflective Surfaces
- Lighting for Different Textures
- Glossy Surfaces
- Matte Surfaces
- Transparent Objects
- Portrait Lighting
-
Post-Processing and Editing
- RAW vs. JPEG
- Color Correction
- Retouching and Enhancements
- Exporting and Saving
Introduction
What Is Studio Lighting?
Studio lighting is a pivotal aspect of photography and videography that involves the deliberate manipulation of light sources to achieve specific visual effects. Whether you're capturing portraits, products, or artistic compositions, mastering studio lighting can elevate your work to new heights.
Why Is Studio Lighting Important?
Lighting plays a paramount role in setting the mood, highlighting details, and creating a professional look in your photos and videos. It's the secret sauce that can transform a mundane shot into a captivating masterpiece. Imagine having full control over the intensity, direction, and quality of light at your disposal.
Setting the Stage for Success
Before we dive deeper into studio lighting techniques and equipment, it's essential to prepare your workspace. A clutter-free, well-organized studio provides the canvas for your creative endeavors. Clean up, organize your gear, and create a comfortable environment for both you and your subjects.
A Glimpse into the World of Lighting Equipment
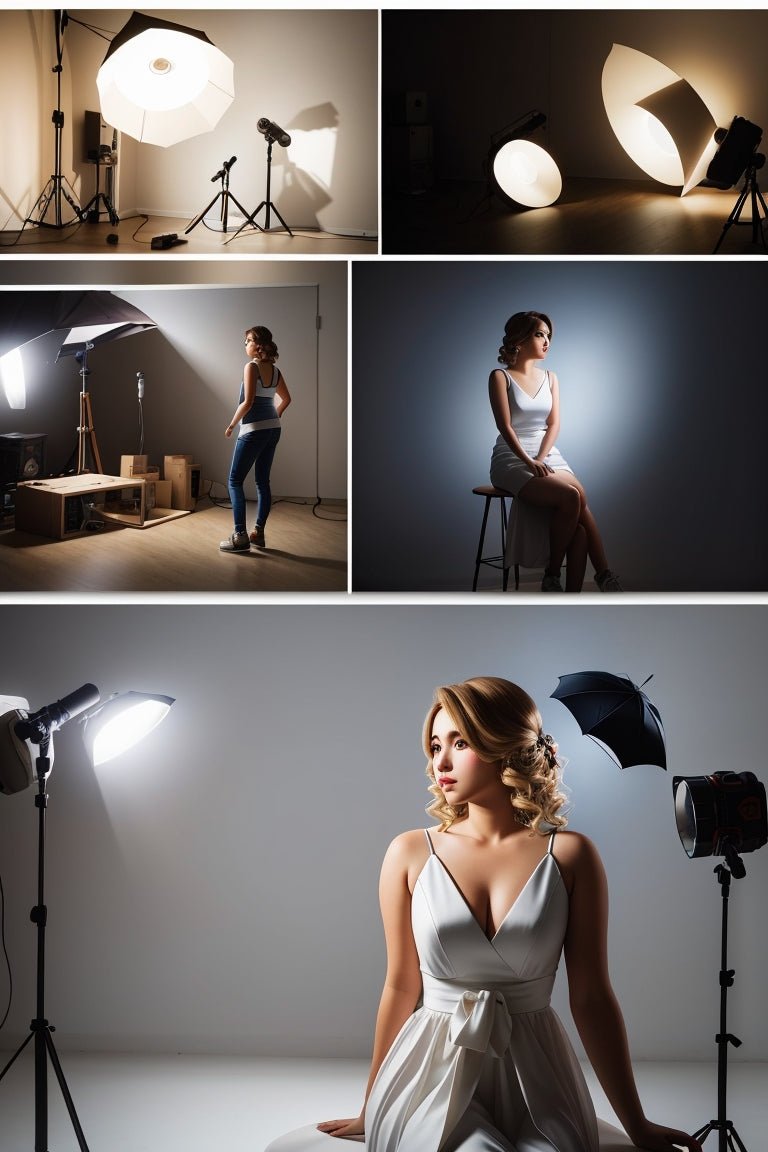
Studio lighting involves a vast array of equipment, from the basics to the most advanced gadgets. As a beginner, you'll want to familiarize yourself with the essential tools that will be your companions on this illuminating journey. Let's take a quick tour of the must-have items in your lighting toolkit.
Understanding Light Sources
Natural vs. Artificial Light
Before we plunge into the realm of artificial lighting, it's crucial to understand the fundamental difference between natural and artificial light sources.
-
Natural Light: The Sun, our primary natural light source, provides soft, diffused light during certain times of the day, like sunrise and sunset, and harsh, directional light during midday.
-
Artificial Light: In studio settings, you have complete control over artificial light sources. These include continuous lighting, flash lighting, LED panels, and tungsten lights. Unlike natural light, you can manipulate these sources to suit your creative vision.
Types of Artificial Light Sources
Continuous Lighting
Continuous lighting sources emit a consistent and constant light stream, making them ideal for beginners. They offer real-time feedback, allowing you to see how light interacts with your subject instantly. Popular continuous lighting options include fluorescent and LED lights.
Flash Lighting
Flash photography involves brief, intense bursts of light from a strobe or speedlight. This type of lighting is perfect for freezing fast-moving subjects and achieving high-contrast effects. Flash lighting can be further categorized into on-camera and off-camera flash setups.
LED Lighting
LED panels are energy-efficient and versatile lighting sources. They emit a continuous, adjustable light that's excellent for video recording and still photography. LEDs come in various sizes and can be modified using accessories like diffusers and gels.
Tungsten Lighting
Tungsten lights, also known as incandescent lights, produce warm, natural-looking illumination. They are commonly used in portrait photography and film production. Tungsten lights can be challenging to control due to their heat output, so proper safety precautions are essential.
Basic Lighting Techniques
Three-Point Lighting
Three-point lighting is the cornerstone of studio lighting setups. It involves three key components:
Key Light
The key light is your primary light source, providing the main illumination for your subject. It's typically placed at a 45-degree angle to the side of your subject and slightly above eye level. Adjust the intensity to control the shadows and highlights on your subject's face.
Fill Light
The fill light softens the shadows created by the key light. It's placed opposite the key light to reduce contrast and create a more balanced look. Use a diffuser or reflector to achieve a gentle fill light effect.
Backlight
The backlight, also known as a rim light, separates your subject from the background. It's positioned behind the subject, casting a subtle glow along their edges. This adds depth and dimension to your shots.
Lighting Ratios: Shedding Light on Shadows
Lighting ratios refer to the balance between the key light and fill light. Different ratios produce varying moods and emphasize different aspects of your subject.
High-Key Lighting
High-key lighting uses minimal shadows, creating a bright and cheerful atmosphere. It's often used in beauty and fashion photography.
Low-Key Lighting
Low-key lighting emphasizes shadows, resulting in a dramatic and mysterious ambiance. It's a favorite in film noir and moody portrait photography.
Balanced Lighting
Balanced lighting maintains an even ratio between the key and fill lights, striking a harmonious balance between light and shadow. It's suitable for classic portraits and corporate headshots.
Essential Lighting Equipment
Cameras and Lenses
Your choice of camera and lens will impact the outcome of your studio shots. While professional cameras offer more advanced features, even entry-level DSLRs or mirrorless cameras can yield fantastic results. Pair your camera with lenses that suit your shooting style, such as prime or zoom lenses.
Light Modifiers
Light modifiers are essential for shaping and controlling the direction of light. Here are some commonly used modifiers:
Softboxes
Softboxes diffuse light, creating soft and flattering shadows. They are perfect for portrait and product photography.
Umbrellas
Umbrellas bounce and spread light, making them great for achieving even, gentle illumination.
Reflectors
Reflectors bounce light back onto your subject, reducing shadows and enhancing highlights.
Grids and Snoots
Grids and snoots focus light into a narrow beam, allowing for precise control of lighting direction.
Light Stands and Mounts
Sturdy light stands and mounts are crucial for positioning your lights securely. Ensure they can support the weight of your equipment and provide flexibility in height and angle adjustments.
Light Meters and Color Temperature
Light meters help you measure and adjust the intensity of your lights accurately. Understanding color temperature is essential for achieving the right mood and white balance in your shots.
Setting Up Your Studio
Choosing the Right Space
Selecting the appropriate space for your studio is vital. Consider factors like size, ceiling height, and access to electrical outlets. Ensure your chosen location can accommodate your lighting equipment and backdrop.
Backgrounds and Props
Backgrounds and props add context and depth to your photos. Invest in versatile backdrops that complement your subject matter. Experiment with different textures, colors, and materials to create visually appealing compositions.
Safety Precautions
Safety should be a top priority in your studio. Prevent accidents by securing cables, keeping liquids away from electronics, and using heat-resistant materials when working with hot lights. Invest in fire extinguishers and first-aid kits for added peace of mind.
Wiring and Power Management
Plan your studio's wiring and power distribution carefully. Use surge protectors to safeguard your equipment from electrical surges. Label cables to prevent confusion and tripping hazards.
Mastering Lighting Techniques
Portrait Lighting
Portrait lighting is a genre where studio lighting truly shines. Let's explore some classic portrait lighting techniques:
Split Lighting
Split lighting divides the subject's face into equal halves, with one side fully illuminated and the other in shadow. It creates a bold and striking look.
Loop Lighting
Loop lighting introduces a small shadow of the subject's nose on their cheek. This softens the face and adds depth.
Rembrandt Lighting
Named after the famous painter, Rembrandt lighting features a small triangle of light on the subject's cheek. It's both dramatic and timeless.
Butterfly Lighting
Butterfly lighting places the key light directly in front of the subject, slightly above eye level. It produces a symmetrical butterfly-shaped shadow under the nose, imparting an elegant and flattering appearance.
Product Photography Lighting
Product photography demands precise lighting to showcase items in their best light. Here are some techniques to enhance your product shots:
Light Tent
A light tent diffuses light evenly around the product, eliminating harsh shadows and reflections. It's ideal for small to medium-sized objects.
Light Table
A light table illuminates products from below, creating a clean and transparent look. This technique works wonders for capturing the intricate details of items like jewelry.
Reflective Surfaces
Use reflective surfaces like white acrylic boards or mirrors to bounce light onto your product, highlighting specific features.
Lighting for Different Textures
The texture of your subject affects how light interacts with it. Let's explore how to light different textures effectively:
Glossy Surfaces
For glossy surfaces, position your lights to create specular highlights that accentuate the shine. Experiment with angles to find the perfect balance between highlights and reflections.
Matte Surfaces
Matte surfaces require soft, diffused lighting to minimize reflections and create an even, consistent appearance.
Transparent Objects
Lighting transparent objects can be tricky. Backlighting is often used to reveal the object's contours while maintaining its transparency.
Post-Processing and Editing
RAW vs. JPEG
When shooting in a studio, consider capturing images in RAW format. RAW files contain more data and allow for greater flexibility during post-processing. However, they require more storage space and post-processing time than JPEGs.
Color Correction
Color correction involves adjusting the color balance of your images to ensure accurate and consistent tones. Use tools like white balance and color grading to achieve the desired look.
Retouching and Enhancements
Retouching is the art of fine-tuning your images. Remove imperfections, enhance details, and apply creative effects to make your photos truly stand out.
Exporting and Saving
When saving your final images, choose the appropriate file format and resolution for your intended use. JPEG is suitable for online sharing, while TIFF or PNG may be preferred for high-quality prints.
FAQs
Q1: What is the best type of lighting for beginners in studio photography?
A1: Continuous lighting, such as LED panels or softboxes, is an excellent choice for beginners. It provides real-time feedback and is easier to control than flash lighting.
Q2: How can I create a DIY studio lighting setup on a budget?
A2: You can build a budget-friendly studio lighting setup using household items like desk lamps, white bedsheets, and aluminum foil as reflectors. Online tutorials can guide you through the process.
Q3: What's the ideal color temperature for studio lighting?
A3: The ideal color temperature depends on your creative vision. Daylight-balanced lighting around 5500K is a versatile choice, but you can adjust it to warmer or cooler tones to achieve specific effects.
Q4: Is post-processing necessary for studio photos?
A4: Post-processing can enhance your studio photos but is not always necessary. It depends on your goals and the quality of your initial shots. Some minor adjustments like cropping and color correction can significantly improve the final result.
Q5: How do I avoid reflections when photographing glass objects in a studio?
A5: To minimize reflections on glass objects, use polarizing filters on your camera lens and control the angle and intensity of your studio lights. Experiment with different lighting angles to find the best setup for your specific subject.


Leave a Comment